FOOD
Best Homemade Hamburger Bun Recipe: Soft, Fluffy & Easy!
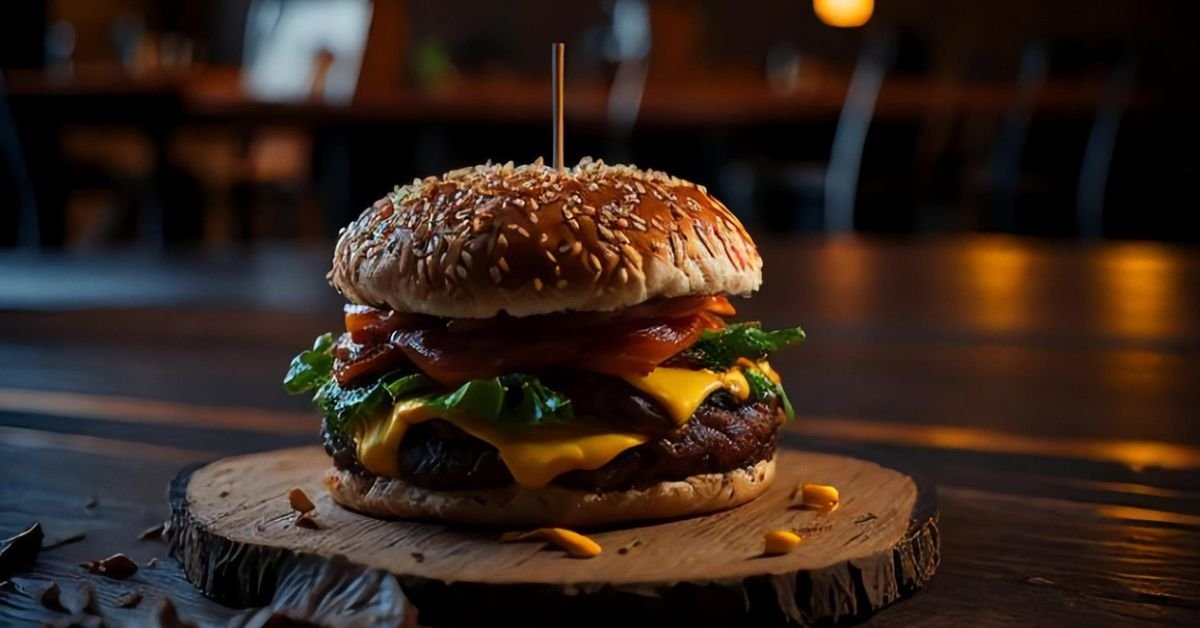
Say goodbye to disappointing store-bought burger buns! This easy homemade hamburger bun recipe produces perfectly soft, fluffy buns with a beautiful golden crust. Made from scratch with simple pantry ingredients, these buns taste infinitely better than anything you’ll find at the supermarket—plus, you know exactly what goes into them (no preservatives!).
Whether you’re planning a backyard barbecue, craving gourmet burgers, or want to elevate your pulled pork sliders, these homemade buns deliver bakery-quality results every time. The enriched dough creates a tender, slightly sweet flavor that complements any filling, while the reliable recipe ensures your buns stay soft for days.
Why You’ll Love This Homemade Bun Recipe
- Superior taste and texture: Soft, fluffy interior with a perfectly golden crust that holds up to even the juiciest burgers
- Simple ingredients: Made from scratch using basic pantry staples you probably already have
- Better than store-bought: No preservatives, artificial flavors, or mystery ingredients
- Cost-effective: Make 8-10 premium-quality buns for a fraction of the price of artisan bakery buns
- Completely customizable: Adjust the size for sliders, add your favorite seeds, or make them dairy-free
- Rewarding to make: There’s nothing quite like serving homemade bread you made yourself
- Stays soft: These buns remain tender and fresh for 3-4 days when stored properly
Ingredient Notes & Possible Substitutions
The Essential Ingredients List
Important: All ingredients should be at room temperature for best results. This ensures even yeast activation and a smooth, cohesive dough.
| Ingredient | Amount (US) | Weight (Metric) | Notes |
|---|---|---|---|
| All-purpose flour | 3½ cups | 420g | Or bread flour for chewier texture |
| Instant yeast | 2¼ tsp (1 packet) | 7g | Can use active dry yeast |
| Whole milk | 1 cup | 240ml | Room temperature; enriches dough |
| Granulated sugar | ¼ cup | 50g | Feeds yeast, adds slight sweetness |
| Unsalted butter | 4 tbsp | 56g | Melted and cooled |
| Large egg | 1 | ~50g | Room temperature |
| Salt | 1½ tsp | 9g | Enhances flavor |
| Sesame seeds | 2-3 tbsp | Optional | For topping |
Expert Substitutions & Variations
Dairy-Free/Vegan: Replace milk with unsweetened almond milk, oat milk, or soy milk. Substitute butter with coconut oil or vegan butter. Use a flax egg (1 tbsp ground flaxseed + 3 tbsp water, let sit 5 minutes) instead of the egg.
Different Milks: Buttermilk creates an extra-tender crumb. Non-dairy alternatives work well but may produce slightly less rich flavor.
Butter Substitute: Use neutral oil (like vegetable or canola) for a softer, lighter texture.
Seeded Buns: Brush tops with egg wash and sprinkle with sesame seeds, poppy seeds, or everything bagel seasoning before baking.
Whole Wheat: Replace up to 50% of all-purpose flour with whole wheat flour. You may need to add 1-2 tablespoons extra milk as whole wheat absorbs more liquid.

Recommended Baking Tools
Essential Tools for Success
- Stand mixer with dough hook: Makes kneading effortless (though hand-kneading works too!)
- Digital kitchen scale: For accurate measurements and consistent results
- Large mixing bowl: If mixing by hand or for the first rise
- Baking sheet: For holding the shaped buns
- Parchment paper: Prevents sticking and makes cleanup easy
- Wire cooling rack: Essential for proper cooling
Helpful but Optional Tools
- Hamburger bun pan: Creates perfectly uniform, professional-looking buns
- Bench scraper: Makes dividing dough into equal portions easier
- Instant-read thermometer: Check dough temperature (ideal: 75-78°F after kneading)
- Pastry brush: For applying egg wash evenly
Step-by-Step Recipe Instructions
Prep Time30 minutes
Rise Time2-3 hours
Bake Time15-18 minutes
Total Time3-4 hours
Yield8-10 buns
Step 1: Making the Dough
- Combine dry ingredients: In the bowl of your stand mixer, whisk together 3 cups (360g) of flour, yeast, sugar, and salt.
- Add wet ingredients: Add the warm milk (about 110°F/43°C—just warm to the touch), melted butter, and egg. Using the dough hook attachment, mix on low speed until combined.
- Knead the dough: Gradually add the remaining ½ cup (60g) flour, a little at a time, until the dough pulls away from the sides of the bowl. Knead on medium speed for 6-8 minutes until the dough is smooth, elastic, and only slightly sticky. The dough should pass the windowpane test—stretch a small piece between your fingers; it should form a thin, translucent membrane without tearing.
Pro Tip: The dough should be soft and slightly tacky to the touch, not dry. Resist the urge to add too much flour! A slightly sticky dough produces softer buns. If kneading by hand, knead for 10-12 minutes on a lightly floured surface.
Step 2: First Proof / Rise
- Let the dough rise: Form the dough into a ball and place it in a lightly greased bowl, turning once to coat. Cover with a damp towel or plastic wrap. Let rise in a warm spot until doubled in size, about 1-2 hours.
Creating a warm proofing environment: Place the bowl in your oven with just the oven light on (do NOT turn on the oven). Alternatively, place it near (not on) a warm stovetop or in a sunny spot. Ideal proofing temperature is 75-80°F (24-27°C).
Step 3: Shaping the Burger Buns
- Deflate and divide: Once doubled, gently punch down the dough to release air bubbles. Turn out onto a lightly floured surface. Using a bench scraper or knife, divide into 8 equal pieces for large burger buns (about 85g each) or 10 pieces for standard buns (about 68g each). For slider buns, divide into 16-20 smaller pieces.
- Shape into balls: Working with one piece at a time, cup your hand over the dough and move it in a circular motion on the counter to form a smooth, tight ball. The surface should be taut with no visible seams on top.
- Flatten slightly: Place each ball on a parchment-lined baking sheet, spacing them about 3 inches apart. Gently press down on each ball to flatten to about ¾-inch thickness. This creates the classic hamburger bun shape.
Step 4: Second Rise & Preheating
- Second proof: Cover the shaped buns loosely with a damp towel or greased plastic wrap. Let rise until puffy and nearly doubled, 30-60 minutes.
- Preheat oven: About 15 minutes before baking, preheat your oven to 375°F (190°C).
Step 5: Baking to Golden Perfection
- Apply egg wash: In a small bowl, whisk together 1 egg with 1 tablespoon water. Gently brush the tops of the buns with the egg wash using a pastry brush.
- Add toppings: If using, sprinkle sesame seeds generously over the egg-washed buns. Press them lightly so they adhere.
- Bake: Bake for 15-18 minutes until the buns are golden brown on top and sound hollow when tapped on the bottom. The internal temperature should reach about 190°F (88°C).
Secret to keeping sesame seeds from falling off: After sprinkling seeds on the egg-washed buns, lightly mist them with water using a spray bottle, then gently press. The moisture helps them stick securely.
Step 6: Cooling & Storing
- Cool completely: Transfer buns immediately to a wire cooling rack. Let cool completely before slicing (about 30 minutes). This prevents them from becoming gummy inside.
- Storage: Store cooled buns in an airtight container or resealable bag at room temperature for up to 4 days. For longer storage, freeze for up to 3 months.
Pro Tips for the Best Burger Buns
Weigh your flour: Using a kitchen scale ensures accuracy. Too much flour makes dense, dry buns. If measuring by volume, use the spoon-and-level method—don’t pack or scoop directly from the bag.
Don’t fear sticky dough: A slightly sticky, soft dough produces the softest buns. If the dough feels too wet after kneading, resist adding more flour. Let it rest for 5 minutes—the gluten will develop and the dough will become more manageable.
Room temperature ingredients matter: Cold milk or eggs can slow yeast activity and create an uneven dough texture. Let refrigerated ingredients sit out for 30-60 minutes before starting.
Check for proper proofing: To test if your dough has risen enough, gently press two fingers into it. If the indentation slowly springs back halfway, it’s ready. If it springs back quickly, give it more time. If it doesn’t spring back at all, you’ve over-proofed (see troubleshooting below).
Toast before serving: For the ultimate burger experience, slice buns in half and toast them cut-side down in a skillet with a little butter until golden. This adds flavor and creates a slight barrier against soggy buns.
Troubleshooting Common Issues
My buns are too dense and heavy
Causes:
- Too much flour was added during kneading
- Dough wasn’t kneaded long enough to develop gluten
- Insufficient rising time
- Old or inactive yeast
Solutions: Use a scale to measure flour accurately. Knead until the dough passes the windowpane test. Always check yeast expiration dates and proof it in warm water with a pinch of sugar if you’re unsure of its viability.
My dough didn’t rise
Causes:
- Dead or expired yeast
- Liquid was too hot (killed the yeast) or too cold (slowed activity)
- Environment was too cold for proofing
- Too much salt was added directly on top of yeast
Solutions: Test yeast freshness before starting. Ensure milk is just warm to touch (105-115°F). Create a warm proofing spot. Keep salt and yeast separate when initially mixing.
The buns are dry or hard
Causes:
- Over-baked—left in oven too long
- Too much flour in the dough
- Buns weren’t stored properly and dried out
Solutions: Watch baking time carefully and remove when just golden. Start checking at 15 minutes. Store buns in an airtight container while still slightly warm to trap moisture. Brush warm buns with melted butter after baking for extra softness.
Buns spread out instead of rising up
Causes:
- Dough was over-proofed during second rise
- Dough was too wet or not shaped tightly enough
Solutions: Don’t let shaped buns over-proof—they should be puffy but not doubled. Shape balls tightly with good surface tension. If dough feels too soft, refrigerate shaped buns for 15 minutes before the second rise.
Tops are too dark but insides are undercooked
Causes:
- Oven temperature too high
- Buns placed on top rack
Solutions: Use an oven thermometer to verify actual temperature. Bake on the middle rack. If tops brown too quickly, tent loosely with foil for the last 5 minutes of baking.
Make-Ahead & Freezing Instructions
Make-Ahead Options
Refrigerate shaped buns overnight: After shaping in Step 3, cover tightly with greased plastic wrap and refrigerate for up to 24 hours. This slow, cold second rise develops even better flavor. When ready to bake, remove from fridge, let sit at room temperature for 30 minutes, then proceed with egg wash and baking.
Freeze unbaked buns: After shaping, freeze on a baking sheet until solid, then transfer to a freezer bag for up to 1 month. To bake, place frozen buns on a parchment-lined sheet, cover, and let thaw and rise at room temperature (2-3 hours), then bake as directed.
Freezing Baked Buns
Cool completely, then wrap individually in plastic wrap and place in a freezer-safe bag. Freeze for up to 3 months. Thaw at room temperature for 2-3 hours or microwave for 20-30 seconds. Refresh in a 350°F oven for 5 minutes for that fresh-baked taste.

Ways to Use Your Homemade Buns
- Classic burgers: Beef, turkey, veggie, or salmon burgers
- Pulled pork or chicken sandwiches: The soft texture is perfect for soaking up BBQ sauce
- Breakfast sandwiches: Fill with eggs, bacon, and cheese
- Sloppy Joes: These buns hold up beautifully to saucy fillings
- Slider buns: Make mini versions for party appetizers
- Grilled veggie sandwiches: A gourmet option for vegetarians
Frequently Asked Questions (FAQ)
Can I make these hamburger buns by hand without a stand mixer?
Absolutely! Mix the dough in a large bowl with a wooden spoon until it comes together, then turn out onto a lightly floured surface. Knead by hand for 10-12 minutes until smooth and elastic. The dough is ready when it passes the windowpane test. Hand-kneading takes a bit longer and more effort, but produces equally delicious results.
Can I use instant yeast instead of active dry yeast?
Yes! They’re interchangeable in equal amounts. The recipe calls for instant yeast because it can be mixed directly with dry ingredients without needing to be activated first. If using active dry yeast, you can still add it directly to the flour mixture—modern active dry yeast doesn’t require proofing, though you can proof it in the warm milk if you prefer.
How do I make these burger buns ahead of time?
The best make-ahead method is to shape the buns, cover them tightly with greased plastic wrap, and refrigerate overnight for a slow second rise. The next day, let them sit at room temperature for 30 minutes, then bake as directed. This method actually enhances flavor! Alternatively, bake the buns completely, cool, and freeze for up to 3 months.
Can I use this dough for other things?
Definitely! This versatile enriched dough works wonderfully for dinner rolls (shape into 16-20 small balls), hot dog buns (shape into 6-inch logs), or even cinnamon rolls. The dough is essentially a sweet roll base, so it’s quite adaptable. For hot dog buns, after shaping into logs, let them rise touching each other on the pan—this creates the signature pull-apart effect.
Why do my sesame seeds fall off?
This is a common issue! The key is applying a generous egg wash first, then sprinkling seeds immediately while the egg wash is still wet. Gently press the seeds into the egg wash. For extra insurance, lightly mist the seeded buns with water from a spray bottle before baking. The moisture helps create a sticky surface that holds seeds in place.
How long do homemade hamburger buns stay fresh?
When stored in an airtight container or resealable bag at room temperature, these buns stay soft and fresh for 3-4 days. The enriched dough (with milk, butter, and eggs) helps them retain moisture longer than lean breads. For even longer storage, freeze baked buns for up to 3 months.
Can I make whole wheat hamburger buns?
Yes! For best results, replace up to 50% of the all-purpose flour with whole wheat flour (about 1¾ cups whole wheat + 1¾ cups all-purpose). Whole wheat flour absorbs more liquid, so you may need to add 1-2 tablespoons extra milk to achieve the right dough consistency. The buns will have a heartier texture and slightly nutty flavor.
Final Thoughts
Once you’ve tasted homemade hamburger buns, you’ll never want to go back to store-bought! The difference in flavor, texture, and overall quality is remarkable. Yes, they require a few hours due to rising time, but the active hands-on work is minimal—just mix, knead, shape, and bake. The reward is soft, fluffy, bakery-quality buns that elevate any burger or sandwich from ordinary to extraordinary.
This recipe is forgiving and perfect for beginners, yet produces professional results that will impress your family and friends. The enriched dough creates that signature soft, slightly sweet flavor and tender crumb that stays fresh for days. Whether you’re hosting a summer cookout, meal-prepping breakfast sandwiches, or just want to experience the satisfaction of baking your own bread, this hamburger bun recipe is a skill worth adding to your culinary repertoire.
Have you tried this recipe? Share your results and any creative variations in the comments below!
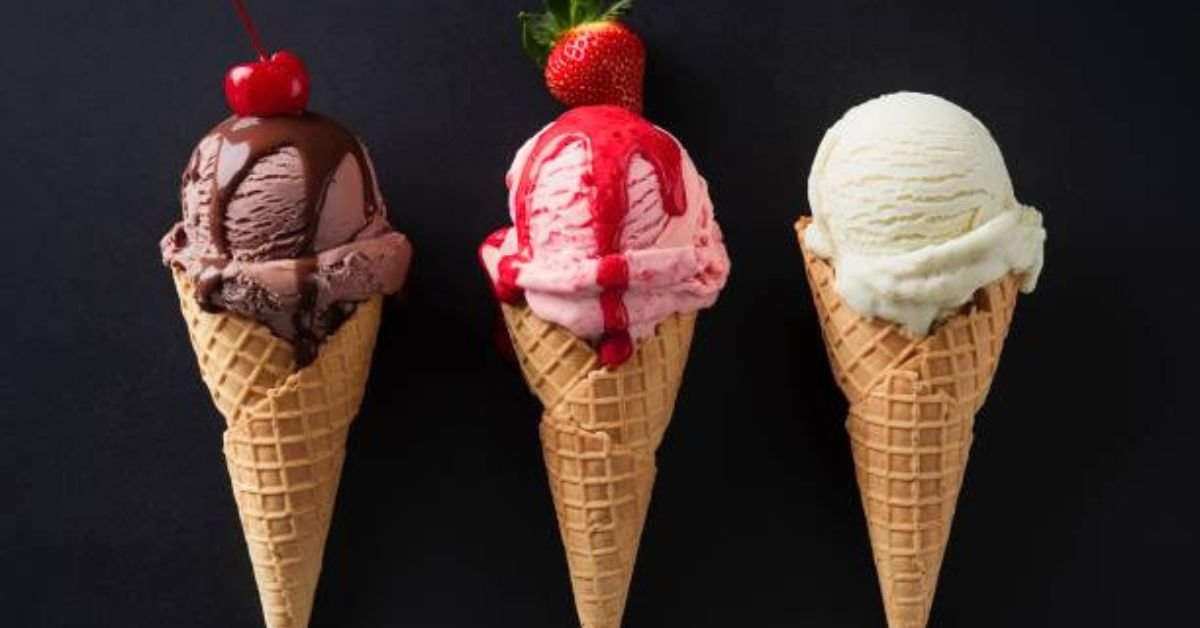
Sugar cone is a type of ice cream cone distinguished by its pointed bottom, flat brim, and distinctively crunchy texture. Unlike its counterparts, the sugar cone is engineered for durability and long-term storage, making it the go-to choice for mass-produced ice cream products and slow eaters who want a cone that won’t get soggy.
Key Features & Specifications
The sugar cone stands out through several defining characteristics:
Shape and Structure:
- Pointed bottom that tapers to a closed tip
- Flat, even brim at the top
- Visible lattice pattern on the surface
- Consistently harder and sturdier than other cone types
Primary Ingredients:
- All-purpose flour
- Brown sugar and molasses (despite being less sweet than waffle cones)
- Vegetable shortening
- Oat fiber for added structure
- Notably contains no eggs, unlike waffle cones
Texture Profile: The sugar cone delivers a satisfying crunch with each bite. Its harder texture means it holds up exceptionally well against melting ice cream, won’t crumble easily, and maintains structural integrity even in warm weather conditions.
The History & Purpose of Sugar Cones
Sugar cones were developed with commercial ice cream production in mind. Unlike waffle cones, which are often made fresh at ice cream parlors, sugar cones were designed for dairies to prefill with ice cream for long-term packaging and storage.
This manufacturing approach made sugar cones ideal for:
- Mass production and distribution
- Grocery store freezer sections
- Prepackaged ice cream products
- Extended shelf life without compromising quality
Major manufacturers like Joy Cone Co. have perfected the sugar cone formula, creating a product that withstands the test of time while maintaining its signature crunch. The cone’s durability made it a staple for Baskin Robbins and other ice cream chains that needed reliable, consistent products.

Sugar Cone vs. Waffle Cone vs. Cake Cone: Detailed Comparison
Understanding the differences between cone types helps you choose the perfect vessel for your ice cream experience.
Side-by-Side Breakdown
| Feature | Sugar Cone | Waffle Cone | Cake Cone |
|---|---|---|---|
| Ingredients | Flour, brown sugar, molasses, vegetable shortening, oat fiber | Flour, eggs, butter, milk, sugar | Flour, sugar, minimal flavoring |
| Texture | Hard, crunchy, sturdy | Crispy but crumbly | Light, crisp, delicate |
| Shape | Pointed bottom, flat brim | Pointed bottom, rounded/irregular edge | Flat bottom, resembles cup |
| Sweetness Level | Moderately sweet | Sweetest option | Least sweet, neutral flavor |
| Sturdiness | Most sturdy, leak-resistant | Less sturdy, can get soggy | Least sturdy but stable base |
| Best For | Slow eaters, warm weather, single/double scoops | Toppings, handheld sundaes, sweet lovers | Soft-serve, kids, neutral pairing |
| Production | Mass-produced, widely available | Often made in-house or mass-produced | Mass-produced |
| Storage | Excellent for long-term packaging | Better fresh, shorter shelf life | Good for prepackaged products |
When to Choose a Sugar Cone
The sugar cone shines in specific situations:
Ideal For:
- Slow eaters who take their time enjoying ice cream
- Warm weather conditions where other cones might get soggy quickly
- Single or double scoop servings that need reliable support
- Anyone who prefers crunch over crumbs in their cone experience
- Take-home purchases where the cone needs to maintain quality
- Pairing with any ice cream flavor without competing sweetness
Key Benefits:
- Holds ice cream without leaking through the bottom
- Won’t get soggy even as ice cream melts
- Provides consistent texture from first bite to last
- Pairs beautifully with all ice cream flavors without overwhelming them
- Available at virtually any grocery store
When to Choose a Waffle or Cake Cone
Waffle Cones Excel When:
- You want the sweetest cone option to complement your ice cream
- You’re creating a handheld sundae with toppings like nuts, chocolate chips, or whipped cream
- The larger size and wider opening accommodate multiple scoops or extravagant portions
- You prefer a buttery, homemade flavor in your cone
- You’re eating at an ice cream parlor with fresh-made cones
Cake Cones Work Best For:
- Soft-serve ice cream that spirals perfectly into the cup-like shape
- Kids who benefit from the stable flat bottom
- Neutral flavor profiles that won’t compete with delicate ice cream flavors
- Budget-conscious choices as they’re typically the most affordable
- Quick eating where sturdiness isn’t as critical
Beyond the Basics: Sugar Cones Explored
Nutrition & Dietary Info
Understanding the nutritional profile helps you make informed choices:
Typical Sugar Cone Nutritional Content:
- Calories: Approximately 40-60 calories per cone
- Total Carbohydrates: 10-12 grams
- Sugars: 3-5 grams (less than waffle cones despite the name)
- Fat: 1-2 grams
- Protein: 1 gram
- Fiber: Less than 1 gram
Dietary Considerations:
Gluten-Free Options: Joy Cone Co. and select manufacturers now offer gluten-free sugar cone versions made with alternative flours. These maintain similar texture and flavor profiles while accommodating gluten sensitivities.
Vegan Status: Most traditional sugar cones are vegan-friendly since they contain no eggs or dairy products. However, always check labels as some manufacturers may use dairy-based ingredients or process cones on shared equipment.
Allergen Information:
- Generally nut-free (but verify with manufacturers)
- May contain traces of wheat, soy
- Produced in facilities that process milk products
- Check for cross-contamination warnings if you have severe allergies
How to Use & Store Sugar Cones
Maintaining Maximum Crispness:
- Store in an airtight container or resealable bag
- Keep in a cool, dry place away from moisture
- Avoid refrigeration, which can introduce humidity
- Use within 6-8 months of purchase for best quality
- Don’t store near foods with strong odors, as cones can absorb them
Buying in Bulk: Sugar cones are perfect for bulk purchases because of their excellent shelf stability. Consider buying larger quantities if you:
- Host frequent ice cream socials
- Run a small business or food service operation
- Want to save money on per-unit costs
- Have adequate storage space

Best Ice Cream Flavor Pairings:
The sugar cone’s moderate sweetness and crunchy texture complement virtually any flavor, but particularly shine with:
- Classic vanilla – lets the cone’s subtle molasses notes enhance the experience
- Chocolate varieties – provides textural contrast to smooth chocolate
- Fruit-based flavors – won’t compete with delicate strawberry, peach, or mango
- Coffee or caramel – complements rich, complex flavors
- Nut-based ice creams – adds extra crunch dimension
Make Your Own Sugar Cones: A Simple Recipe
Create authentic sugar cones at home with this straightforward recipe.
Ingredients:
- 2 egg whites
- ½ cup granulated sugar
- 6 tablespoons unsalted butter, melted
- 2 tablespoons molasses
- 1 teaspoon vanilla extract
- ⅔ cup all-purpose flour
- Pinch of salt
Special Equipment:
- Pizzelle maker or cone-shaped waffle iron
- Cone-shaping form or aluminum foil cone template
Instructions:
- Prepare the Batter: Whisk egg whites and sugar until well combined. Add melted butter, molasses, and vanilla, mixing thoroughly. Gradually fold in flour and salt until smooth. Let batter rest for 10 minutes.
- Heat Your Iron: Preheat pizzelle maker or cone iron to medium-high heat. Lightly grease with cooking spray.
- Cook the Cones: Pour 2 tablespoons of batter onto the center of the iron. Close and cook for 60-90 seconds until golden brown.
- Shape Immediately: Working quickly while still hot, remove the round wafer and wrap around your cone form. Hold for 30 seconds until it sets into shape.
- Cool Completely: Stand cones upright in a tall glass to cool completely. This ensures they maintain their shape and develop maximum crispness.
- Store Properly: Once completely cool, store in an airtight container for up to one week.
Tips for Success:
- Work quickly when shaping—the wafers harden fast
- Practice makes perfect; your first few may not be perfect
- Adjust cooking time based on desired crispness
- Make the lattice pattern by using a grooved iron or pizzelle maker
Frequently Asked Questions (FAQ)
Are sugar cones actually sweeter than waffle cones?
No, this is a common misconception. Despite the name, waffle cones are typically sweeter than sugar cones. Sugar cones contain brown sugar and molasses, which provide flavor complexity rather than intense sweetness. The name “sugar cone” refers more to the original manufacturing process and ingredient list rather than the level of sweetness compared to other cone types.
Which cone is the sturdiest and least likely to leak?
The sugar cone is the sturdiest option and least prone to leaking or becoming soggy. Its harder texture and construction make it ideal for slow eaters and warm weather conditions. The cone’s durability comes from its specific ingredient ratios and the absence of eggs, which can make other cones more fragile when they absorb moisture from melting ice cream.
Can I buy sugar cones at the grocery store?
Yes, sugar cones are widely mass-produced and available at virtually all grocery stores. Unlike some in-house waffle cones that are only available at specialty ice cream parlors, sugar cones are designed for retail distribution. You’ll find them in the ice cream aisle alongside other cone varieties, typically from brands like Joy Cone Co., or your grocery store’s private label brand.
What’s the main difference in shape between sugar and waffle cones?
The most noticeable shape difference is the rim: sugar cones have a flat, even brim, creating a uniform circular opening at the top. In contrast, waffle cones have a rounded, irregular edge that often appears more organic and handmade. Both feature pointed bottoms, but sugar cones typically have more consistent, precise dimensions due to their mass-production manufacturing process.
Are there gluten-free or vegan sugar cone options?
Yes, options exist for both dietary needs. Joy Cone’s gluten-free line offers sugar-style cones made with alternative flours that maintain similar taste and texture. For vegan options, many traditional sugar cones already qualify since the standard recipe contains no eggs or dairy products—just flour, brown sugar, molasses, and vegetable shortening. However, always check product labels to confirm vegan status and verify there’s no cross-contamination during manufacturing if you have strict dietary requirements.
How long do sugar cones stay fresh?
When stored properly in an airtight container in a cool, dry place, sugar cones can maintain their quality for 6-8 months. Their excellent shelf stability is one reason they became the industry standard for prepackaged ice cream products. Unopened packages often have even longer shelf lives. Signs that cones have gone stale include loss of crispness, stale odor, or absorbing flavors from nearby foods.
Can I use sugar cones for baking projects?
Absolutely! Sugar cones are versatile beyond ice cream. Creative uses include:
- Crushing them as a crunchy topping for desserts
- Using whole cones as edible serving vessels for mousses or puddings
- Creating decorated cone “Christmas trees” for holiday treats
- Incorporating crushed cones into pie crusts for added texture
- Building creative cake decorations or cupcake toppers
Conclusion
The sugar cone represents the perfect marriage of functionality and flavor in the ice cream cone world. Its sturdy construction, moderate sweetness, and reliable performance in various conditions make it the go-to choice for slow eaters, warm weather enjoyment, and anyone who prioritizes structural integrity in their ice cream experience.
Whether you’re choosing between cone types at your local ice cream shop, stocking your freezer with prepackaged treats, or experimenting with homemade versions, understanding what makes the sugar cone unique empowers you to make the best choice for your preferences. Its timeless appeal and practical advantages ensure the sugar cone will remain an ice cream staple for generations to come.

Pizza Hut of your childhood The one with the signature red roof, the smell of fresh pan pizza wafting through the air, and that unforgettable salad bar experience? While most Pizza Hut locations have transformed into streamlined take-out and delivery outlets, a special collection of restaurants known as Pizza Hut Classic locations continue to preserve that beloved retro experience. These old-fashioned dine-in restaurants offer a blast from the past that’s drawing both nostalgic adults and curious first-timers eager to experience what made Pizza Hut an iconic American dining destination.
What Is a Pizza Hut Classic Restaurant?
A Pizza Hut Classic restaurant is a preserved or minimally updated location that maintains the original dine-in experience that defined the brand from the 1960s through the 1990s. Unlike modern Pizza Hut outlets that focus primarily on carryout and delivery, these classic locations feature full table service, dedicated dining rooms, and in many cases, the famous all-you-can-eat lunch buffet that generations of families enjoyed.
The term “Pizza Hut Classic” isn’t always an official designation, but rather a description used by fans and enthusiasts to identify locations that have retained their traditional atmosphere and service model. These restaurants stand in stark contrast to the converted storefront locations and express outlets that dominate the Pizza Hut landscape today.
What makes these locations special is their commitment to preserving not just the food, but the entire dining experience. Walking into a Pizza Hut Classic feels like stepping back in time, complete with design elements and service styles that have largely disappeared from the modern restaurant industry.
Features & Nostalgic Experience
The Iconic Diner Atmosphere
The physical atmosphere of a Pizza Hut Classic is immediately recognizable to anyone who visited Pizza Hut during its golden age. These restaurants feature the signature design elements that made the brand distinctive, including Tiffany-style lamps hanging over booths, checkered tablecloths that evoke classic Italian-American dining, and the iconic red cups that have become collectible items in their own right.
Many locations still have jukeboxes or vintage music playing, creating an authentic retro ambiance that modern restaurants rarely attempt. The distinctive red roofs, often visible from the highway, serve as beacons for travelers seeking a familiar dining experience. Inside, you’ll find booth seating with that particular vinyl texture, salad bar areas (where still operational), and game rooms that entertained children for decades.
The lighting is warm and intimate rather than the bright, efficiency-focused illumination of modern fast-casual restaurants. Wood paneling, brass fixtures, and carpet patterns that were popular in the 1980s all contribute to an environment that feels genuinely preserved rather than artificially recreated.
Service & Dining Options
The defining characteristic of Pizza Hut Classic locations is their commitment to full table service. When you arrive, a host seats you at your table. A server takes your order, brings your drinks in those famous red cups, and delivers your pizza on a raised metal stand—the same presentation style that made sharing a pizza feel like a special occasion.
The crown jewel of many Pizza Hut Classic locations is the all-you-can-eat lunch buffet. Typically offered on weekdays during lunch hours, the buffet includes multiple pizza varieties, pasta dishes, breadsticks, and access to the salad bar. This buffet experience was once a staple at Pizza Hut locations nationwide but has become increasingly rare as the company shifted its business model.
Evening and weekend service focuses on made-to-order pizzas, allowing you to customize your meal just as you would at any Pizza Hut, but with the added benefit of having it freshly delivered to your table by attentive staff. The pace is relaxed, encouraging diners to linger over their meals rather than rushing through a quick take-out transaction.
Pizza Hut Classic vs. Modern Pizza Hut
Understanding the differences between Pizza Hut Classic locations and modern outlets helps explain why these retro restaurants have such devoted followings:
| Feature | Pizza Hut Classic | Modern Pizza Hut |
|---|---|---|
| Primary Service Model | Dine-in with table service | Carryout and delivery focused |
| Atmosphere | Retro restaurant with booth seating, Tiffany lamps, vintage decor | Streamlined storefront or strip mall location |
| Lunch Buffet | Often available on weekdays | Rarely available; eliminated at most locations |
| Salad Bar | Sometimes still operational | Discontinued at nearly all locations |
| Dining Experience | Leisurely, family-oriented sit-down meal | Quick transaction, minimal seating |
| Nostalgia Factor | High—designed to preserve original experience | Low—focused on modern efficiency |
The modern Pizza Hut strategy prioritizes delivery and digital ordering, reflecting changing consumer habits. Classic locations, by contrast, serve a niche market of customers who value the experiential aspects of dining out. They’re destinations rather than convenient stops, drawing customers who specifically seek out the retro atmosphere and full-service experience.
Menu & Food: What to Expect
The menu at Pizza Hut Classic locations closely mirrors the standard Pizza Hut menu, featuring all the pizzas you’d expect: Original Pan Pizza, Thin ‘N Crispy, Hand Tossed, and specialty pizzas. What sets these locations apart isn’t necessarily different menu items, but rather the way food is prepared and served.
Many enthusiasts report that pizzas from Classic locations taste “like they used to,” though this may be influenced as much by the dining environment as by any actual recipe differences. The pan pizza, baked in well-seasoned pans and served piping hot on a metal stand at your table, hits differently than the same pizza consumed from a cardboard box at home.
The lunch buffet, where available, typically includes several pizza varieties rotated throughout service, including perennial favorites like pepperoni, supreme, and cheese. You’ll also find pasta offerings such as spaghetti or fettuccine with marinara or alfredo sauce, breadsticks with marinara dipping sauce, and cinnamon sticks for dessert.
Prices at Classic locations are generally comparable to standard Pizza Hut pricing, though buffet costs vary by location and are typically in the $8-12 range for lunch. The value proposition isn’t just about the food quantity, but the entire nostalgic experience that comes with it.

How to Find a Pizza Hut Classic Location
Pizza Hut Classic locations exist in approximately 22 states across the United States, though the exact number fluctuates as restaurants renovate, close, or occasionally return to the classic format. These locations are concentrated more heavily in certain regions, with notable presences in North Carolina, the Midwest, and parts of the South.
Finding a true Classic location requires some research. The Retrologist, a popular resource for retro restaurant enthusiasts, maintains a regularly updated list of confirmed Classic locations. However, because Pizza Hut doesn’t officially market these as a separate category, and because individual franchise owners make decisions about restaurant format, the landscape changes frequently.
Your best strategy for finding a Pizza Hut Classic near you:
- Search online for “Pizza Hut Classic locations” along with your state or region
- Look for visual cues in photos: red roof architecture, older building style, mentions of “dine-in” or “buffet” in reviews
- Call ahead to confirm the restaurant offers table service and ask about buffet availability
- Check review sites like Google Maps and Yelp—customers often mention if a location has the “old school” atmosphere
- Join retro restaurant groups on social media where enthusiasts share confirmed locations
Keep in mind that even confirmed Classic locations may have limited hours for dine-in service or may have temporarily suspended buffet service. Always call ahead to avoid disappointment.
Frequently Asked Questions
Is the food at Pizza Hut Classic locations still the same?
The food at Pizza Hut Classic locations uses the same recipes, ingredients, and preparation methods as other Pizza Hut restaurants. However, many customers report that the pizza “tastes better” at Classic locations. This perception likely stems from the dine-in experience—eating pizza fresh from the oven, served on proper dishware in a pleasant atmosphere, genuinely enhances the eating experience compared to consuming the same pizza from a delivery box at home. Additionally, Classic locations with high dine-in traffic may have more frequent pizza turnover, ensuring fresher product.
How can I tell if my local Pizza Hut is a “Classic” style?
Look for these telltale signs: the building has a distinctive red roof or vintage architecture (often from the 1970s-1990s), the location advertises a lunch buffet or dine-in service, customer reviews mention “old school” atmosphere or nostalgia, and photos show booth seating with Tiffany lamps or checkered tablecloths. If you’re still unsure, simply call and ask if they offer table service and a lunch buffet—these are the defining features of a Classic location.
Do all Pizza Hut Classic locations have a lunch buffet?
Not all Classic locations maintain the buffet, though many do. Buffet availability depends on individual franchise owners’ decisions and local market conditions. Some locations offer the buffet only on certain weekdays, while others may have discontinued it but still maintain the retro dine-in atmosphere. Always call ahead to confirm current buffet availability and hours, as these can change seasonally or based on staffing levels.
Are Pizza Hut Classic restaurants more expensive?
Pricing at Classic locations is generally comparable to standard Pizza Hut restaurants. Menu item prices are consistent across the brand, whether you’re ordering for dine-in at a Classic location or carryout from a modern outlet. The lunch buffet, where available, typically costs between $8-12 per person, which many customers find to be excellent value given the all-you-can-eat format and the full dining experience.
Can I host parties or events at a Pizza Hut Classic?
Most Pizza Hut Classic locations welcome group reservations and birthday parties, continuing the tradition that made Pizza Hut a popular destination for children’s celebrations. Many locations have separate party rooms or can accommodate larger groups in their dining areas. Contact your local Classic location directly to inquire about party packages, which often include pizza, drinks, and sometimes arcade game tokens or other special touches for birthday guests.
Why Pizza Hut Classic Locations Matter
In an era when dining has increasingly moved toward convenience and efficiency, Pizza Hut Classic locations represent something deeper than mere nostalgia. They’re functioning museums of American casual dining culture, preserving an experience that shaped countless childhood memories and family traditions.
For older generations, these restaurants offer a genuine connection to the past—a chance to share with children and grandchildren the exact experience they enjoyed decades ago. For younger visitors, they provide a glimpse into a different era of dining out, when meals were unhurried social occasions rather than quick fuel stops.
The survival of these Classic locations also demonstrates that there’s still a market for experiential dining. While delivery apps and ghost kitchens dominate industry headlines, the fact that Pizza Hut Classic restaurants continue operating—and often thriving—proves that people still value atmosphere, service, and the ritual of sharing a meal in a welcoming space.
Planning Your Visit
If you’re lucky enough to have a Pizza Hut Classic location within driving distance, consider making it a destination rather than just another meal. Arrive during lunch buffet hours if available, bring family members who remember the original Pizza Hut experience, and take time to appreciate the details—the vintage decor, the red cups, the familiar smell of pan pizza baking.
Remember to always call the restaurant ahead to confirm hours and buffet availability, as schedules can vary. Bring cash for arcade games if the location has them, and don’t be surprised if you find yourself lingering longer than planned—that’s exactly what these restaurants were designed for.
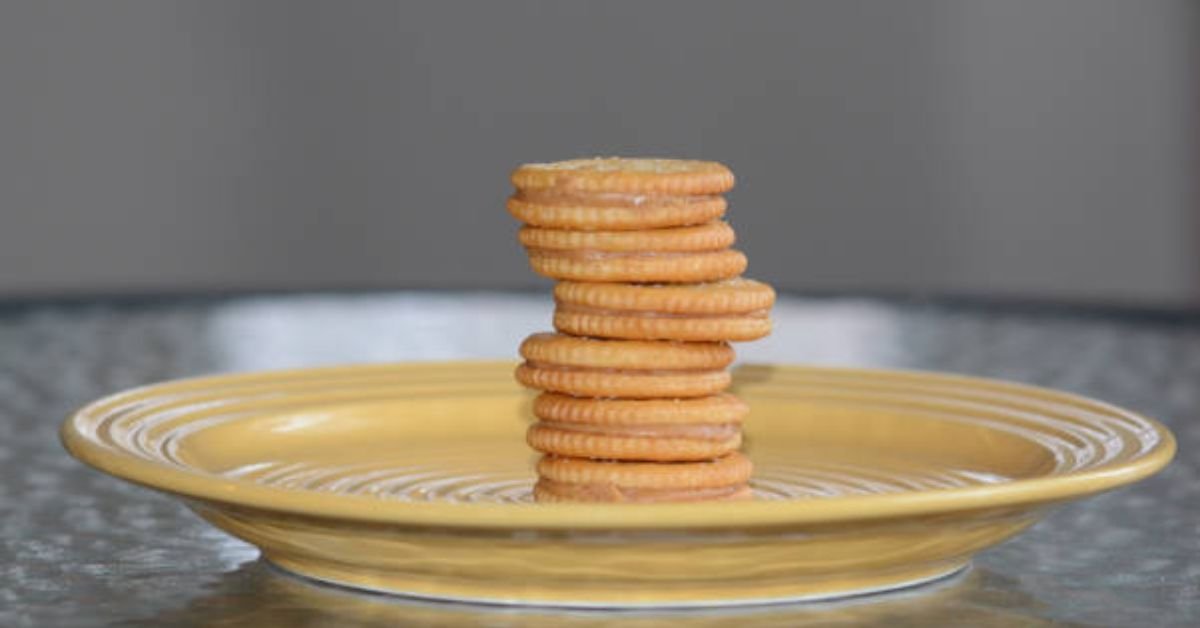
Peanut butter crackers have experienced a resurgence in popularity, driven in part by the growing demand for convenient, portable snacks. With their perfect balance of crunch and creaminess, it’s no wonder they’re a hit with consumers of all ages.
The Perfect Pairing: Peanut Butter and Crackers
So, what makes peanut butter and crackers such a great combination? For one, the rich, nutty flavor of peanut butter pairs perfectly with the crunchy texture of crackers. It’s a match made in heaven, and one that’s hard to resist.
One snack enthusiast raved about their favorite peanut butter crackers, saying, “I love making my own peanut butter crackers at home. It’s so easy to customize the ingredients and flavors to suit my taste.”
The Pros and Cons of Peanut Butter Crackers
While peanut butter crackers are a tasty and convenient snack, there are some potential drawbacks to consider. For one, many commercial peanut butter crackers are high in added sugars, salt, and unhealthy fats. Additionally, some people may be allergic to peanuts or have sensitivities to certain ingredients.

Making Healthier Peanut Butter Crackers
Fortunately, it’s easy to make healthier peanut butter crackers at home. By using natural peanut butter, whole grain crackers, and minimal added sugars, you can create a snack that’s both delicious and nutritious.
Peanut Butter Crackers in Modern Times
In 2025, the peanut butter crackers landscape is more diverse than ever, with a wide range of flavors and ingredients available. From classic peanut butter and salted crackers to more adventurous options like honey roasted peanut butter and whole grain crackers, there’s something for everyone.
The Rise of Artisanal Peanut Butter Crackers
As consumers become increasingly interested in unique, high-quality products, artisanal peanut butter crackers are on the rise. With their focus on natural ingredients, creative flavor combinations, and small-batch production, these crackers are a great option for those looking to elevate their snack game.
Frequently Asked Questions
Q: Are peanut butter crackers a healthy snack option?
A: While many commercial peanut butter crackers are high in added sugars and unhealthy fats, healthier options are available. Look for natural peanut butter, whole grain crackers, and minimal added sugars.
Q: Can I make my own peanut butter crackers at home?
A: Yes! Making peanut butter crackers at home is easy and allows you to customize the ingredients and flavors to suit your taste.
Q: What are some creative ways to use peanut butter crackers?
A: Peanut butter crackers are a versatile snack that can be used in a variety of ways, from topping yogurt or oatmeal to using as a base for trail mix.
Q: Are peanut butter crackers suitable for people with peanut allergies?
A: Unfortunately, no. Peanut butter crackers contain peanuts, making them a potential allergen. If you have a peanut allergy, consider alternative snack options.
Conclusion
Peanut butter crackers, you’ll discover a snack that’s both delicious and versatile. Whether you’re a fan of classic peanut butter and salted crackers or more adventurous flavors, there’s a peanut butter cracker out there for you.

 SCIENCE9 months ago
The Baby Alien Fan Bus Chronicles
- BUSINESS9 months ago
Mastering the Art of Navigating Business Challenges and Risks
- WORLD7 months ago
Money Heist Season 6: Release Date, Cast & Plot
- BUSINESS9 months ago
Newport News Shipbuilding Furloughs Hit Salaried Workers
- BUSINESS7 months ago
Top Insights from FintechZoom.com Bitcoin Reports
- TECH7 months ago
VK Video Downloader: How to Save Videos Easily
- WORLD9 months ago
Rainwalkers: The Secret Life of Worms in the Wet
- WORLD9 months ago
Rainborne Royals: The Rise of Winged Termites